Monday, September 28, 2009

First Fall Forray, Hooray!

Hello Everyone~
I don't know how the weather where y'all are is behaving, but today was the first day in Northern California that it's begun to feel a little like fall, yipee! I love the fall, its my favorite season. My wedding was in the fall...*gazing dreamily into space* Thinking of the fall always makes me feel happy, like a new beginning... a left over from my school years I think.

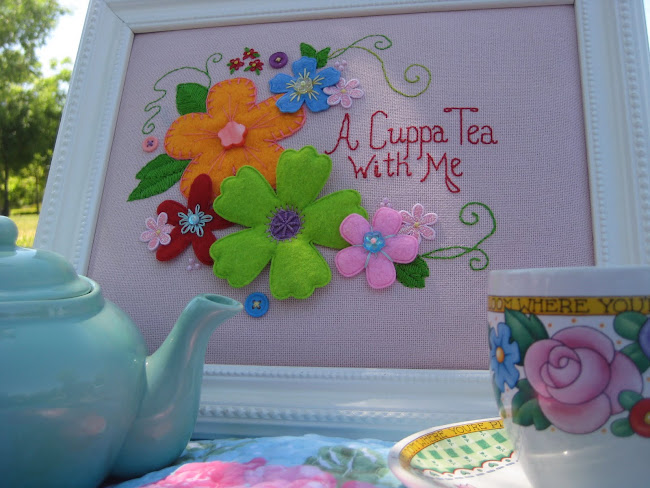
I whipped up this little bookmark over the weekend, it's kinda cute, no? I'm thinking of making a few more for my new bookclub peeps. I just started a new group and our first meeting is in mid October, this would be perfect. Yes, I think I'll do that :o) That book it's resting on is our first book club pick if anyone is interested, it's called The Magicians by Lev Grossman. I'm only about 150 pages in, but so far, so good!

It got me wondering what craf~tea fall things my bloggy buddies were up to, I'd love to hear all about them!

oxo,
Lisa
Thursday, September 24, 2009

Ahhh... what a life.

Ahhhh, another evening in the garden...

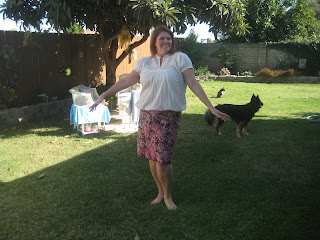
Now this, this is a perfect late September evening. Relaxing in the yard with my dogs and cats lazily milling about, a good book in my lap, an ice cold glass of Wild Blackberry tea, perfect weather, humming birds hovering near by and I dont have to cook dinner tonight. And I'm posting this from my phone again, so I'm bloggin from the garden! The only thing that could make it better is if my hubby was here. Darn swing shift!


Oh yeah, and I won a contest today from my favorite tea blog, thanks Angela! Soon, I'll be snuggled in front of the fireplace enjoying my free subscription to Town & Country!

oxo~Lisa

Monday, September 21, 2009

A Midnight Masquerade...

Hello Everyone~
It's been busy around here lately! Tea parties, and house guests and baking oh my! Not a whole lof of crafting & sewing going on, none that I can share anyway. Teehee! I do have a few craf~tea secrets started up my sleeves, but they'll have to stay secret for a while... I'm trying to get a jump on Christmas and it's already the first day of fall!

Since I can't say much about what I've been up to just yet, I thought I'd revisit something that I created this past spring when my niece, Ana asked me to make her a mask to go along with her outfit for her Junior Prom. I'm particularily happy about the way this project turned out. Of all the things I've made, this is the one I'm the most proud of because 1. Ana LOVED it (yay!!) and 2. it turned out way "beyond-my-skills" pretty, if I do say so myself! (Toot-toot! I think I may have just blown my own horn! Do forgive me.)

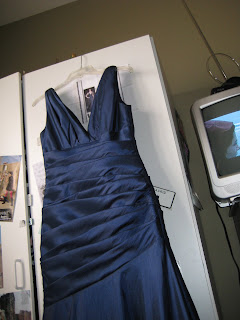
This is Ana's dress, what beauty, what style... what? Dang! Va~va~va~voom! When did my little niecy-poo grow enough curves to fill this thing out? It happens fast people. This dress is what I think of when I envision iconic, Hollywood glamour and sophistication. Just gorgeous. (as a side note for anyone who's interested... yes, that is Twilight you see playing on the TV next to the dress, it plays constantly in this house... my niece is just a scouche obsessed, she even does a blog it's over here -------> See it? It's called Dazzled Hearts.) As soon as I saw the dress I envisioned exactly what I wanted her mask to look like. I could see it finished in my minds eye, but could I pull it off? Ana trusted me completely and gave me total creative freedom, which I have to say is pretty amazing for a 16 (at the time) year old girl. Off to JoAnn's to gather my supplies!
I started with a simple, plain black mask. I removed the string which holds it to your head and sprayed the front of the mask with aerosol adhesive, then I sprinkled black glitter over the entire front of the mask and let it dry over night.
Next day I hit a snag. My plan was to lay navy blue lace that matched her dress over the black sparkles so that you could see the lace, but also the structure of the mask glittering underneath. Dimensional you know? Layers of pretty! I started by spraying adhesive over the top of the glitter... ick! What was I thinking? BIG MISTAKE (which you can see above). It made the glitter dull and sticky, yucky bummer! Lesson learned. Back to the JoAnn's for another mask. I sprayed and sprinkled again (in the parking lot of my office - on my lunch hour!), and this time when it came to the lace, I sprayed the back of the lace with the adhesive and ever so delicately laid it over the contours the glittery mask. Perfecto!
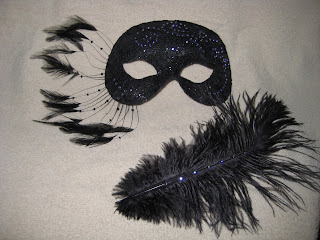
Bada Bing, bada boom, this thing is coming together nicely! When I slit holes in the eyes, the adhesive that was on the back of the lace folded perfectly flat onto the inside of the mask, bonus! Next I added lavender rhinestones in a swirly pattern that I'd free handed, I wanted substantial bling, but not gawdy. And can I just say... placing rhinestones is a booger. Then I added the beaded feather piece that you see on the left, and added a few more rhinestones up the center of the large black plume. After this I simply added a few other feathers (I got into the process and forgot to take pictures of this...oops!) You have to be careful at this stage, it's easy to go over board, you have to think with a critical eye. I didn't want Ana to have to fidget around with a mask that actually sat on her face and mussed up her hair & makeup, so I added a handle to the mask. I started with a small dowel, cut it to size, painted it black, then wrapped it in a lattice of lavender, and light blue ribbons. I accented the end with a large Aurora Borealis crystal that I found in the jewelry making section at Michael's. I hung a few more pieces of ribbon from he bottom to give it a little more presence, including one that looked like a delicate silver chain. Here's a better picture of the end of the "wand". As it turns out, the crystal was great because it was rather heavy so it added balance to the entire piece. Without it, the mask might have felt a little top heavy.
I hot glued the "wand" into place, then finished the inside of the mask with soft, black, peel-n-stick felt so that it would look finished, and more importantly, so as not to scratch up a pretty face!
Viola! This is the finished mask, bellissimo! But you don't get the full effect until you see it in the hands of a beautiful girl. So without further adieu... meet Ana.
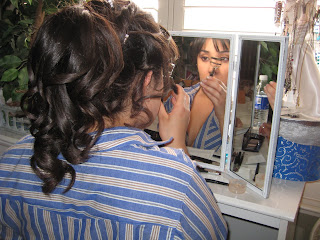
Fancy hair, check! Pretty makeup, check! Loves her auntie, check-check!

Here are Ana and her Nana, my mother-in-love, Kathleen. Kathleen did the fancy hair job. She's a pro and it was beautiful, there were rhinestones placed here and there all over the back.

She loved her mask, I was so relieved!! I mean, I loved it, but I wasn't sure she would. She said it was the best one at the prom and she carried it around with her the entire night. Awww, that's so sweet!
Isn't she a knock out?? I took so many pictures of her that day that it was almost painful to pick just these few. I wish I could show you all of them, if you were sitting here having tea with me, I would! Oh well what the heck, here's one more with her radiant, happiest smile!
I love her so much! I was really happy to make this for her, and I think it complimented her look so well. I'm usually a thrifty person when it comes to crafting, so I'd have to say that this was not an inexpensive project, I think the materials cost about $40, but we priced masks like this online and they started at around $100. It took some time too, altogether I'd say about 8-10 hours. Also, this is a sturdy piece, not at all flimsy, and who knows what we would have gotten with regard to quality from the internet. Regardless, Ana is a special girl, way more than a niece, she's my friend and this was my gift to her. I was thrilled to be a part of her prom.
Boy, as usual, I'm long winded! Sorry bout that, I hope your eyes haven't gone crossed!
I'd love to hear your thoughts, I might be making another mask soon for a birthday, so please sent any pointers you have my way!
oxo,
Lisa

Sunday, September 13, 2009

A Halloween Giveaway!

Hi All~

Just a quick little bloggie before I tuck in for the night, big doins tomorrow! Fall is in the air and it's time for the Renaissance Faire! Hazzah!! I'm taking Mom and 2 little nieces who've never been before, mwahahaha... it's time show them the light!


Call me a geek, I don't care I love the Renaissance Faire and have been going since I was 15... whoa... that's 20 years! Shhh! Let's keep that between us, ok? Here's a picture of Mom and I at last years Valhalla Ren Faire in Lake Tahoe, Ca. Too darn fun...

Anyway my bloggie buddy, Paulette posted this little goodie and I feel compelled to share with you all!

If you love Halloweeen, you simply must check this out and enter the giveaway, so much cool stuff!! Go! Now! http://artisticthalloweenqueens.blogspot.com/. Hurry, you only have until September 22nd. Good luck!

Nighty-night!

~Lisa

Wednesday, September 9, 2009

A New Skirt For Me!

Hello Peeps~
I know out here in Blogland, there's this nifty thing called Wordless Wednesday's. That sounds great, but I'm no good without words. I'm working on it, y'know, being so wordy... people have told me that when they read something that I've written, it's exactly like listening to me talk. Same inflection, same tone, same rambling on and on, the whole nine.

Sigh... Well, I can't help it, but today I'll try to be as wordless as possible.

Sew (hehe, pardon the pun) over the weekend, not only did I embroider that dahling little teapot potholder that you'll see if you kindly scroll down, I also made a skirt... from scratch!! It's actually my first garment ever. And I didn't have a pattern, I just copied a simple drawstring skirt that I've had forever and is really comfy - oh yeah - I'm trying to be wordless! Enough with the bla, bla, bla... on with the pictures!

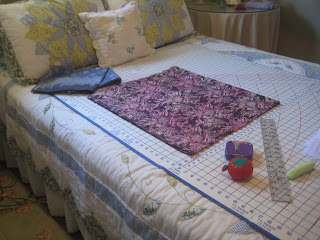
Measure, measure, measure... (as we say in construction, measure twice, cut once.)

Ooh, batik... pretty!

Press, press, press...

Sew, sew, sew...

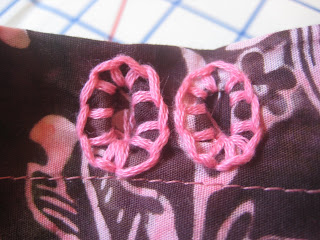
Embroidering button holes for the drawstring...

See, like this... not too neat, but I was going for completion. Not perfection.

Everything is nicer with a pink bow...

Hee hee! It's done! Now the big question... will it fit?

Yes!!

Taa Daaa! I love it! I'm sew (hehe) wearing this to work!!

oxo~Lisa

Monday, September 7, 2009

Tea, Baseball and... Pot Holders?

Hello All~
I hope you've all had a wonderful and relaxing Labor Day weekend!

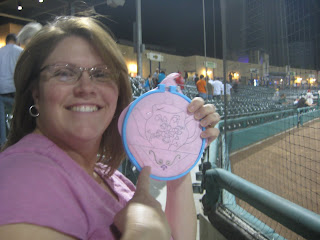
I love birthdays! Even though mine has been over & done for a few weeks, I'm still getting to enjoy it. Case in point, these pretty teapot iron on transfers my mom gave to me this year. I've never used transfers before, but I thought these were just great! Thanks Mom! Sean decided last week that since baseball season was almost over for our Stockton Ports, that he wanted to see one last game for the year. He didn't have to twist my arm too hard, I've been wanting to go ever since I saw this. So Wednesday evening after dinner, I sat down to a little pot of my current favorite tea (Blueberry Bang Rooibos) prepared a little project, and gathered up a small embroidery kit to take to the game on Thursday. The transfers are from a company called Aunt Martha's. I think Mom said she found them at Beverly Craft for just a couple of bucks.

I picked up this small quilted pot holder from the dollar bin at JoAnn's several months ago... I didn't have a specific project in mind when I bought it, just vague plans for some type of embroidery... I thought it was a cute little blank canvas, and for only a buck I wouldn't be too upset if I ruined it.
I chose a pretty transfer with flowers look like little bells, but also kind of like Lily of the Valley...
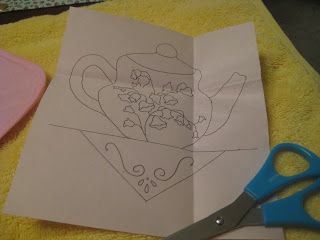
Transferring the design was so simple and quick and the design came out clean as a whistle, no smudges!
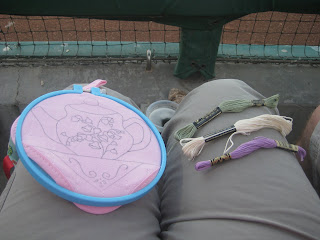
After we'd settled in our seats at the game, I whipped out my needle & thread and prepared to stitch! I was a little apprehensive at first because we were in the very first row... right behind home plate... and Comcast was televising the game that night! Can you imagine? Sitting at home watching the game, and every time they show the batter up at the plate there's a lady right behind him stitching away? Ha! Sean teased me about it, said I'd better make my stitches nice & neat! Oh, the pressure!!

As it turns out, this was a pretty exciting game (we won too, yay!), and I didn't get very much done, see... did I mention it was $2 beer night?

I vowed to not let my little pot holder sit unfinished for too long, I didn't have a lot of time on Friday evening and I spent what little time I did have, adding a few more tid bits to my sampler (music notes, soo cute!). Saturday was busy too, in fact this entire Labor Day weekend has been very busy, but close to home and very productive, so it was a good thing! So after an afternoon garden tea party with my mother-in-law and my 4 year old niece (more on that later), and making dinner for Sean, I finally sat down and started stitching in earnest at about 8:30pm on Saturday night and didn't stop until I was finished!
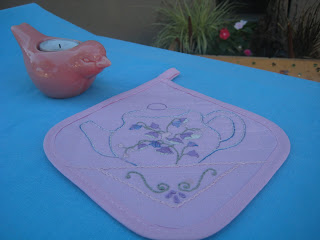
Which wasn't until 3:10am!! Whew! I was getting a little bleary-eyed near the end. I think I can see some wonky stitch work... but I'm not telling where... This was also my first time using the Satin Stitch. I was really leary about that type of stitch, I'd only ever practiced them on the cross stitch fabric, and they didn't look very good because you just can't get the stitches close enough together to fill in a solid area so I didn't know exactly how to do them. Should I outline the design in back stitch first then fill in or just start filling the design in right from the get-go?
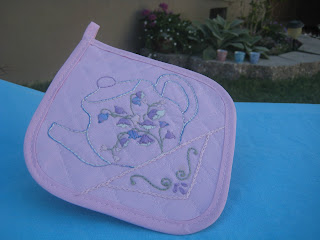
Not knowing, I first tried the back stitch, then fill in method. See that big yucky lavender flower? No... I thought, that can't be right, looks too sloppy... Just fill in then, like a coloring book... yes! I'd originally outlined the teapot in ivory back stitching, but it didn't stand out enough against the pink, kind of just faded into nothing. So last night I restitched around the ivory outline of the teapot again using the variegated lavender/blue/pink floss that I'd used on some of the flowers. Much better.
I'm really pleased with the finished project, it's pretty and I like the colors. I'm not really going to use it for messy pots and pans though, I think I'll put it with my tea towels and use it as a trivet for the teapot. I'd love to hear any tips you all might have on doing the satin stitches better. I'm sure I'll improve with practice, but I'm always open to ideas and comments.
Hope September is finding you well!
oxo~Lisa